As Valentine day approaches, I thought it'd be a good time to share a silhouette Valentine project. It's my goal to post more tutorials on the blog this year, so I remembered to take photos as I crafted this project, designing as I went along. Here is the result...
It is a chipboard Valentine, showcasing a lovely lady in white surrounded by 'love'. Here are some of the supplies I used - pink toile scrapbook paper, light pink cupcake liner, chipboard heart and silhouette.
I cut out the silhouette on white parchment card stock, using an image from a
Dear Lillie blog post. (It is the same image I used on my
sister's tote bag). There are some great silhouette images on the
Graphics Fairy blog, too.
I also used white Elmer's glue (not pretty enough for the photo), a roll of white crepe paper and white glittered chipboard letters from the craft store:
Here are the steps I took...
Step 1 - Cut out the scrapbook paper to fit on the front of the chipboard heart. Glue on top:
Step 2 - Gather together and pinch up the center of the pink cupcake liner:
Step 3 - Flatten out the pink cupcake liner with the pinched part still together. This is to make the liner a bit smaller and ruffled to fit onto the heart:
Step 4 - Turn the cupcake liner over and flatten it to the center of the heart. Glue the liner to the heart, then glue the silhouette and letters to the liner. (You could also use the letters to personalize the Valentine with a monogram):
Step 5 - Fold a section of crepe paper in half lengthwise. You will need to continue doing this as you work with it:
Step 6 - Starting at the bottom point, spread white glue (that dries clear) on a small area at the back edge of the Valentine. Begin to gather the crepe paper together for a ruffled effect, positioning the Valentine inside the center of the folded crepe paper. Press the gathered crepe paper down onto the glue:
Continue gathering and gluing along the edge. This is how the back of the Valentine will look when you're done gluing the crepe paper. At the end, snip off the crepe paper and fold under to glue at the bottom point:
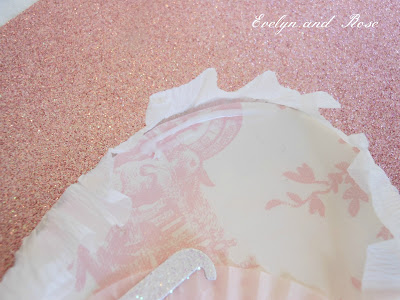
The front of the Valentine will look like this, with the crepe paper raised up a bit:
Step 7 - Add some glue to the front edging to hold this crepe paper down. Press lightly:
Here is the finished result. I love the soft pinks, white and sparkle.:
Have fun with this idea - use your favorite colors, textures and paper scraps. Add a loop of string or ribbon at the top to hang it as an ornament, and cover the back with more scrapbook paper if it will be seen.
Happy crafting!
Sharing with:
Blissful Whites Wednesday
Be Inspired Friday
Feathered Nest Friday
Primp Your Stuff party
Pink Saturday


